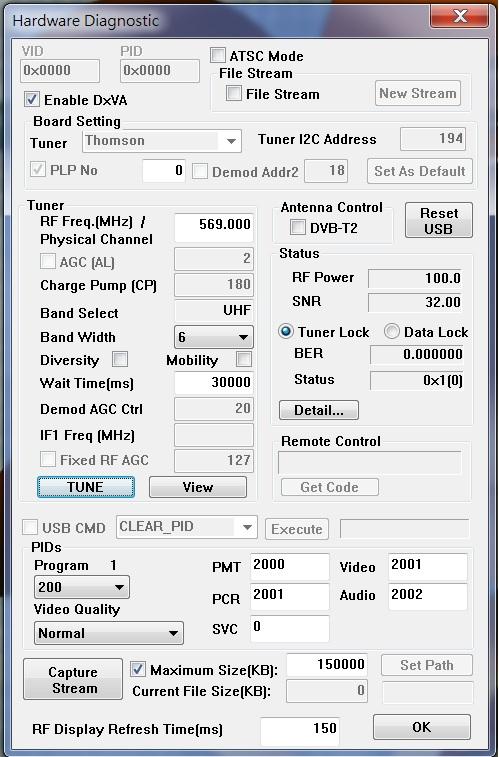
It describes the information about the channel and the device working status.
Users could input the frequency in RF Freq and press the TUNE button and see all the information here.
DxVA: The video acceleration is enabled if it is checked.
Tuner Box
RF Freq. [MHZ]/ Physical Channel: It indicates the frequency of current channel. Users could also enter a frequency for testing.
Band select: It shows the frequency band name which is loaded from frequency table (FreqInfo.ini)
Band width: It shows the bandwidth setting (6 MHz, 7 MHz and 8 MHz).
Checked If the frequency is for DVB-T2 multiplex.
Status Box (RF Power, SNR, BER, status)
RF Power (Radio Frequency Power): It shows the strength of signals. It’s better more than 90.
SNR (Signal to Noise Ratio): It describes the quality of signals. The normal value of SNR is around 20 or above.
BER (Bit Error rate): BER is the percentage of bits that have errors relative to the total number of bits received after error correction. It is normally zero.
Status: The figures in parentheses shows number of retry every 0.5 seconds when there is no stream received.
Capture Stream button: Press the button to capture streams. Press again, capture will be stopped.
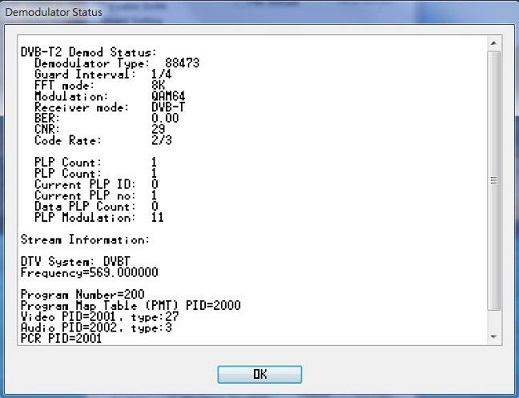
Detail Button
Click this button and it will show the information about demodulator status and stream status.
Demodulator status shows some information like Receiver mode, Modulation and CNR.
Stream information shows the data of the stream like DTV system, Frequency, and the program number.
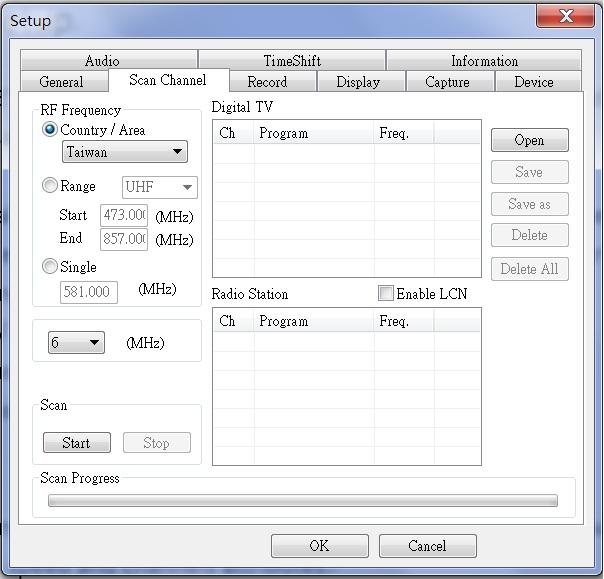
Press key ‘E’ on keyboard to start advanced setup. In this mode, user would see many tabs and can adjust some settings in each tab.
The 3 tabs will be introduced particularly.
Scan channel tab: User could edit the channel table and scan channels here. Especially, there are 3 modes of scanning in the RF Frequency box, which are ‘Country/ Area’, ‘Range’ and ‘Single’.
Select Country/ Area, users would scan by default frequency’s range.
Select Range, users could set the range of frequency to scan.
Select Single, users would scan single frequency.
To save / load the channel list or delete the channel, users could press the button on the right side of this tab, click right button on the mouse to rename the channel.
Below the RF frequency box, users could adjust the bandwidth and press start button to start scanning.
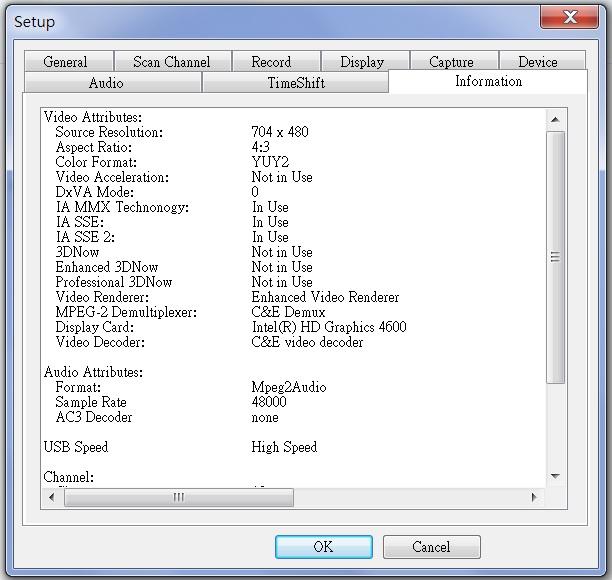
Information tab: In this page, users could see some information retrieved from the player, include video attributes, audio attributes, USB speed and channels attributes.
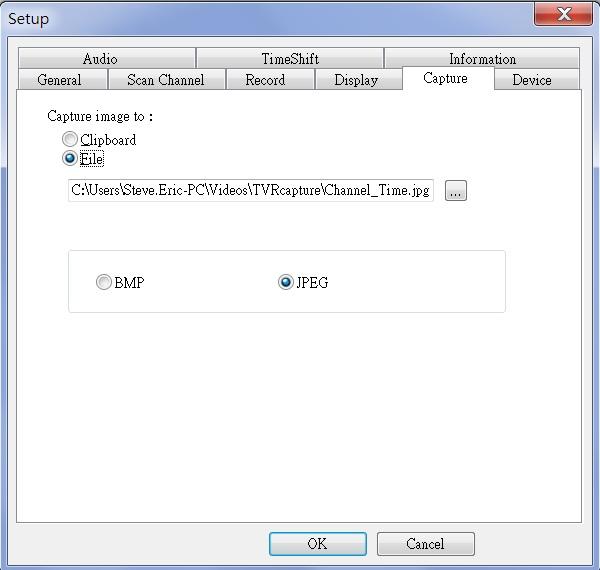
Capture tab:
In this tab, users could set the path to save the file which is grabbed (Grab Image button).
To change the path, press the ‘…’ button to choose the folder to save and name it (please keep Channel_Time in the file name for actual channel name and time replacement).